 TrainNotes
Understand one workout’s summary
The workout summary explains one finished session. Its totals and charts describe that workout; PRs compare it with preceding results, and Training streak supplies the weekly context as of its finish date.
Open and read the summary
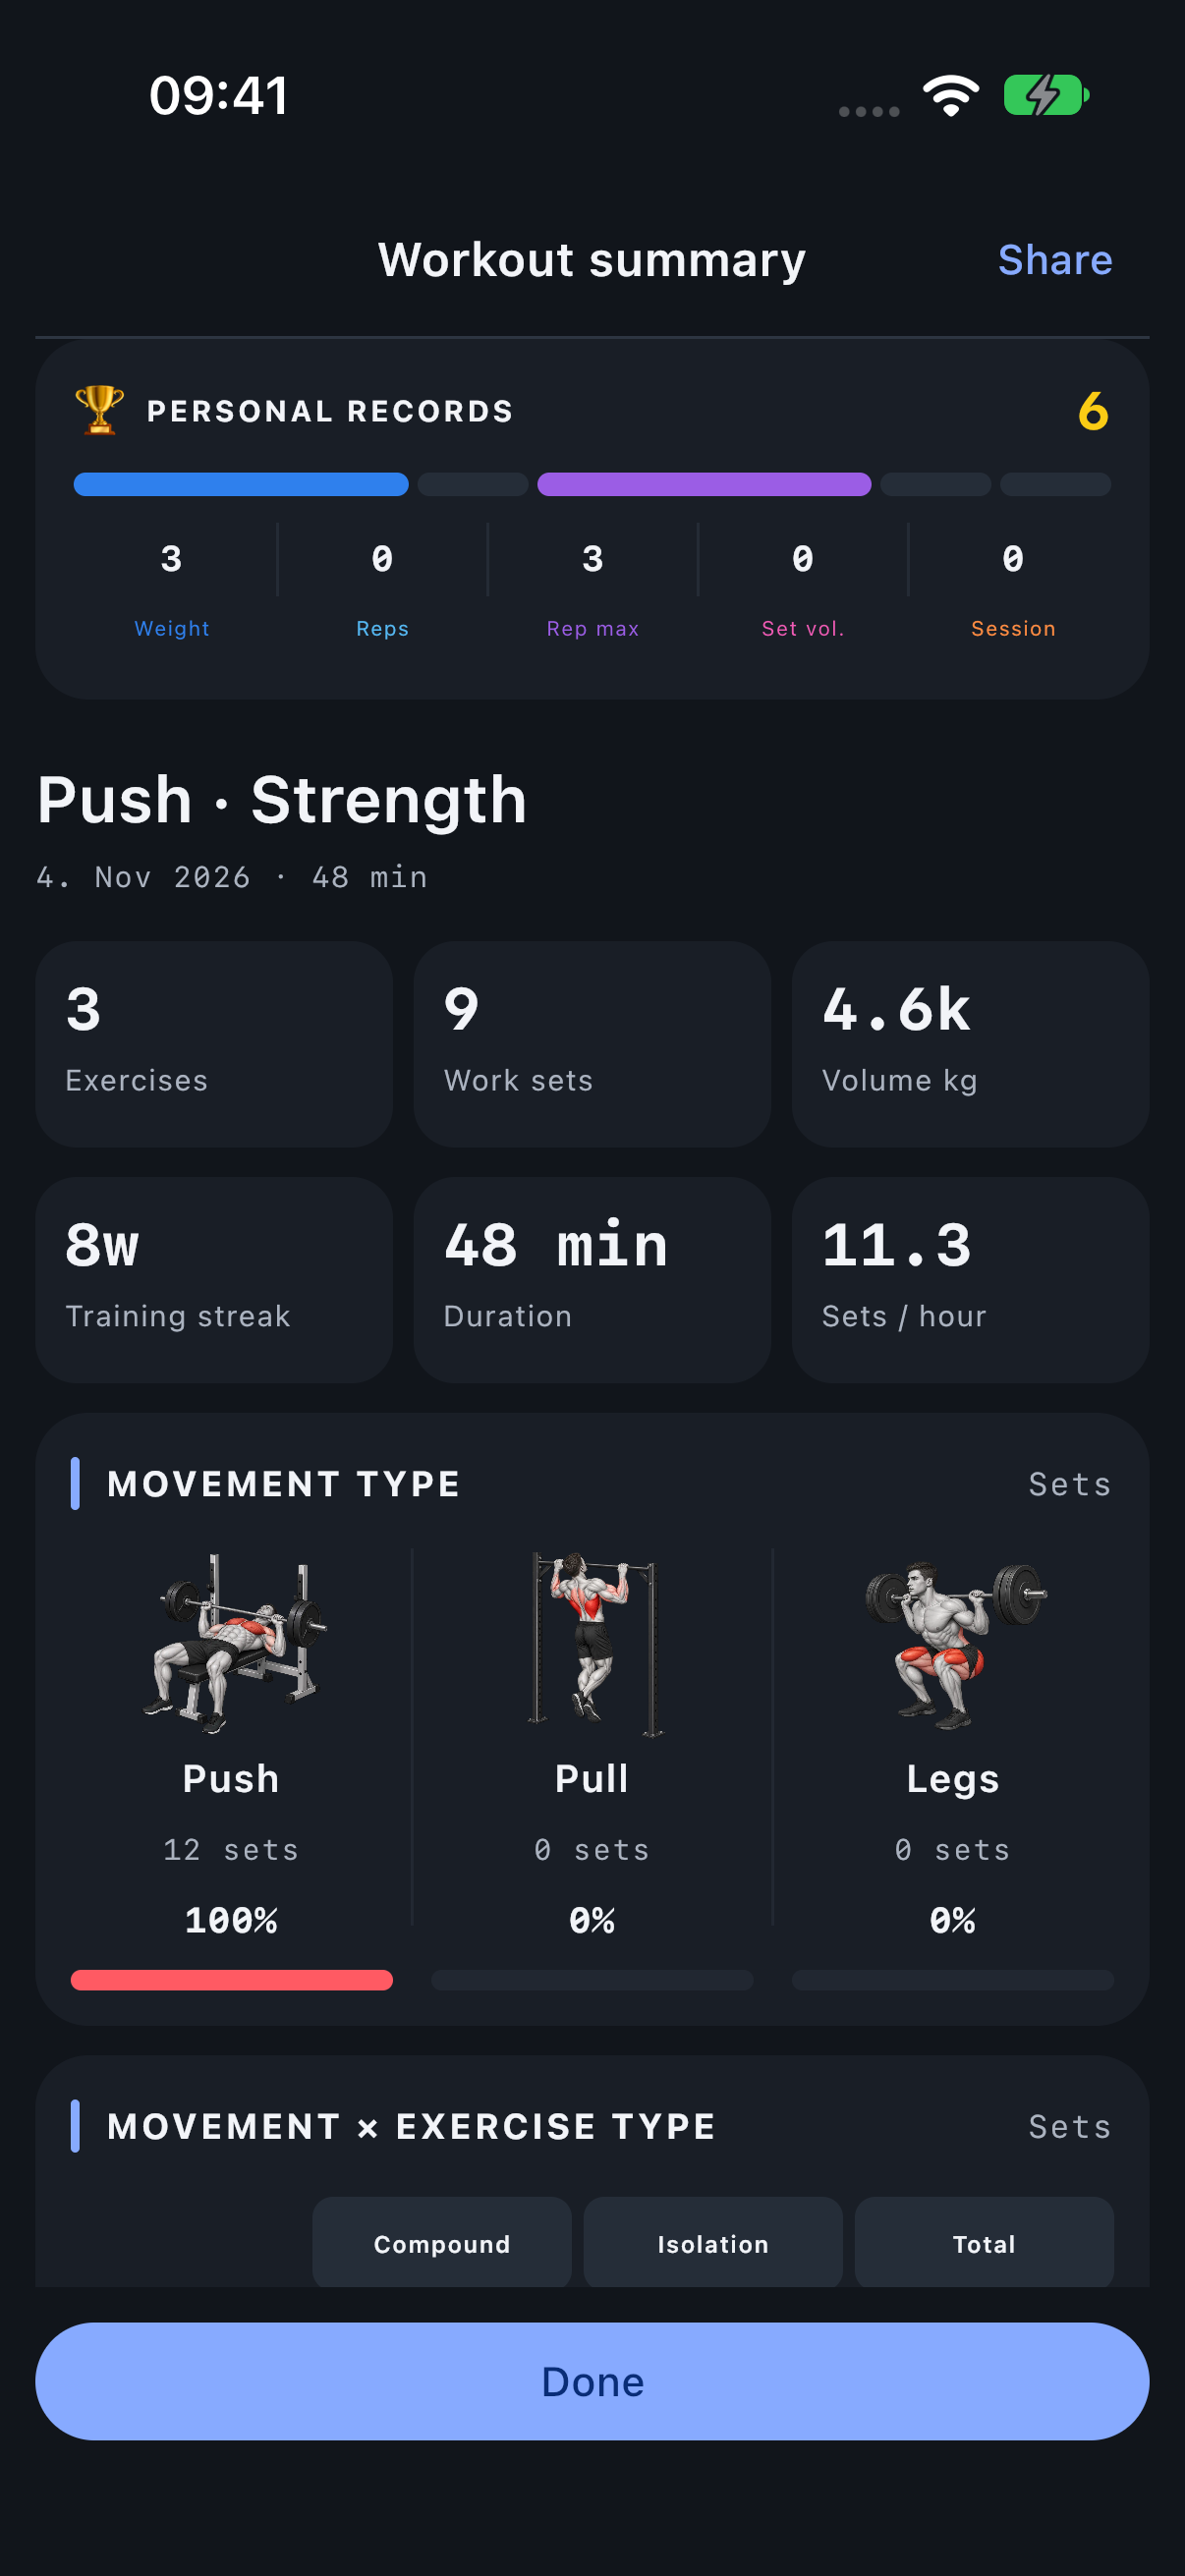
Finish a live session to open its summary. To revisit it later, open the workout in History and tap Summary. Personal records appears first; the workout name and date identify the session whose values you are reading.
Review records and totals
The PR overview counts categories achieved in this workout. Then read Exercises, Work sets and Volume together with Duration and Sets/hour. Warm-ups stay separate from working totals. These headline Work sets, Volume and Sets/hour use the actual session work. The classification and muscle charts below use role-weighted contributions, so their totals can differ. A high rate describes timing, not the quality of the training.
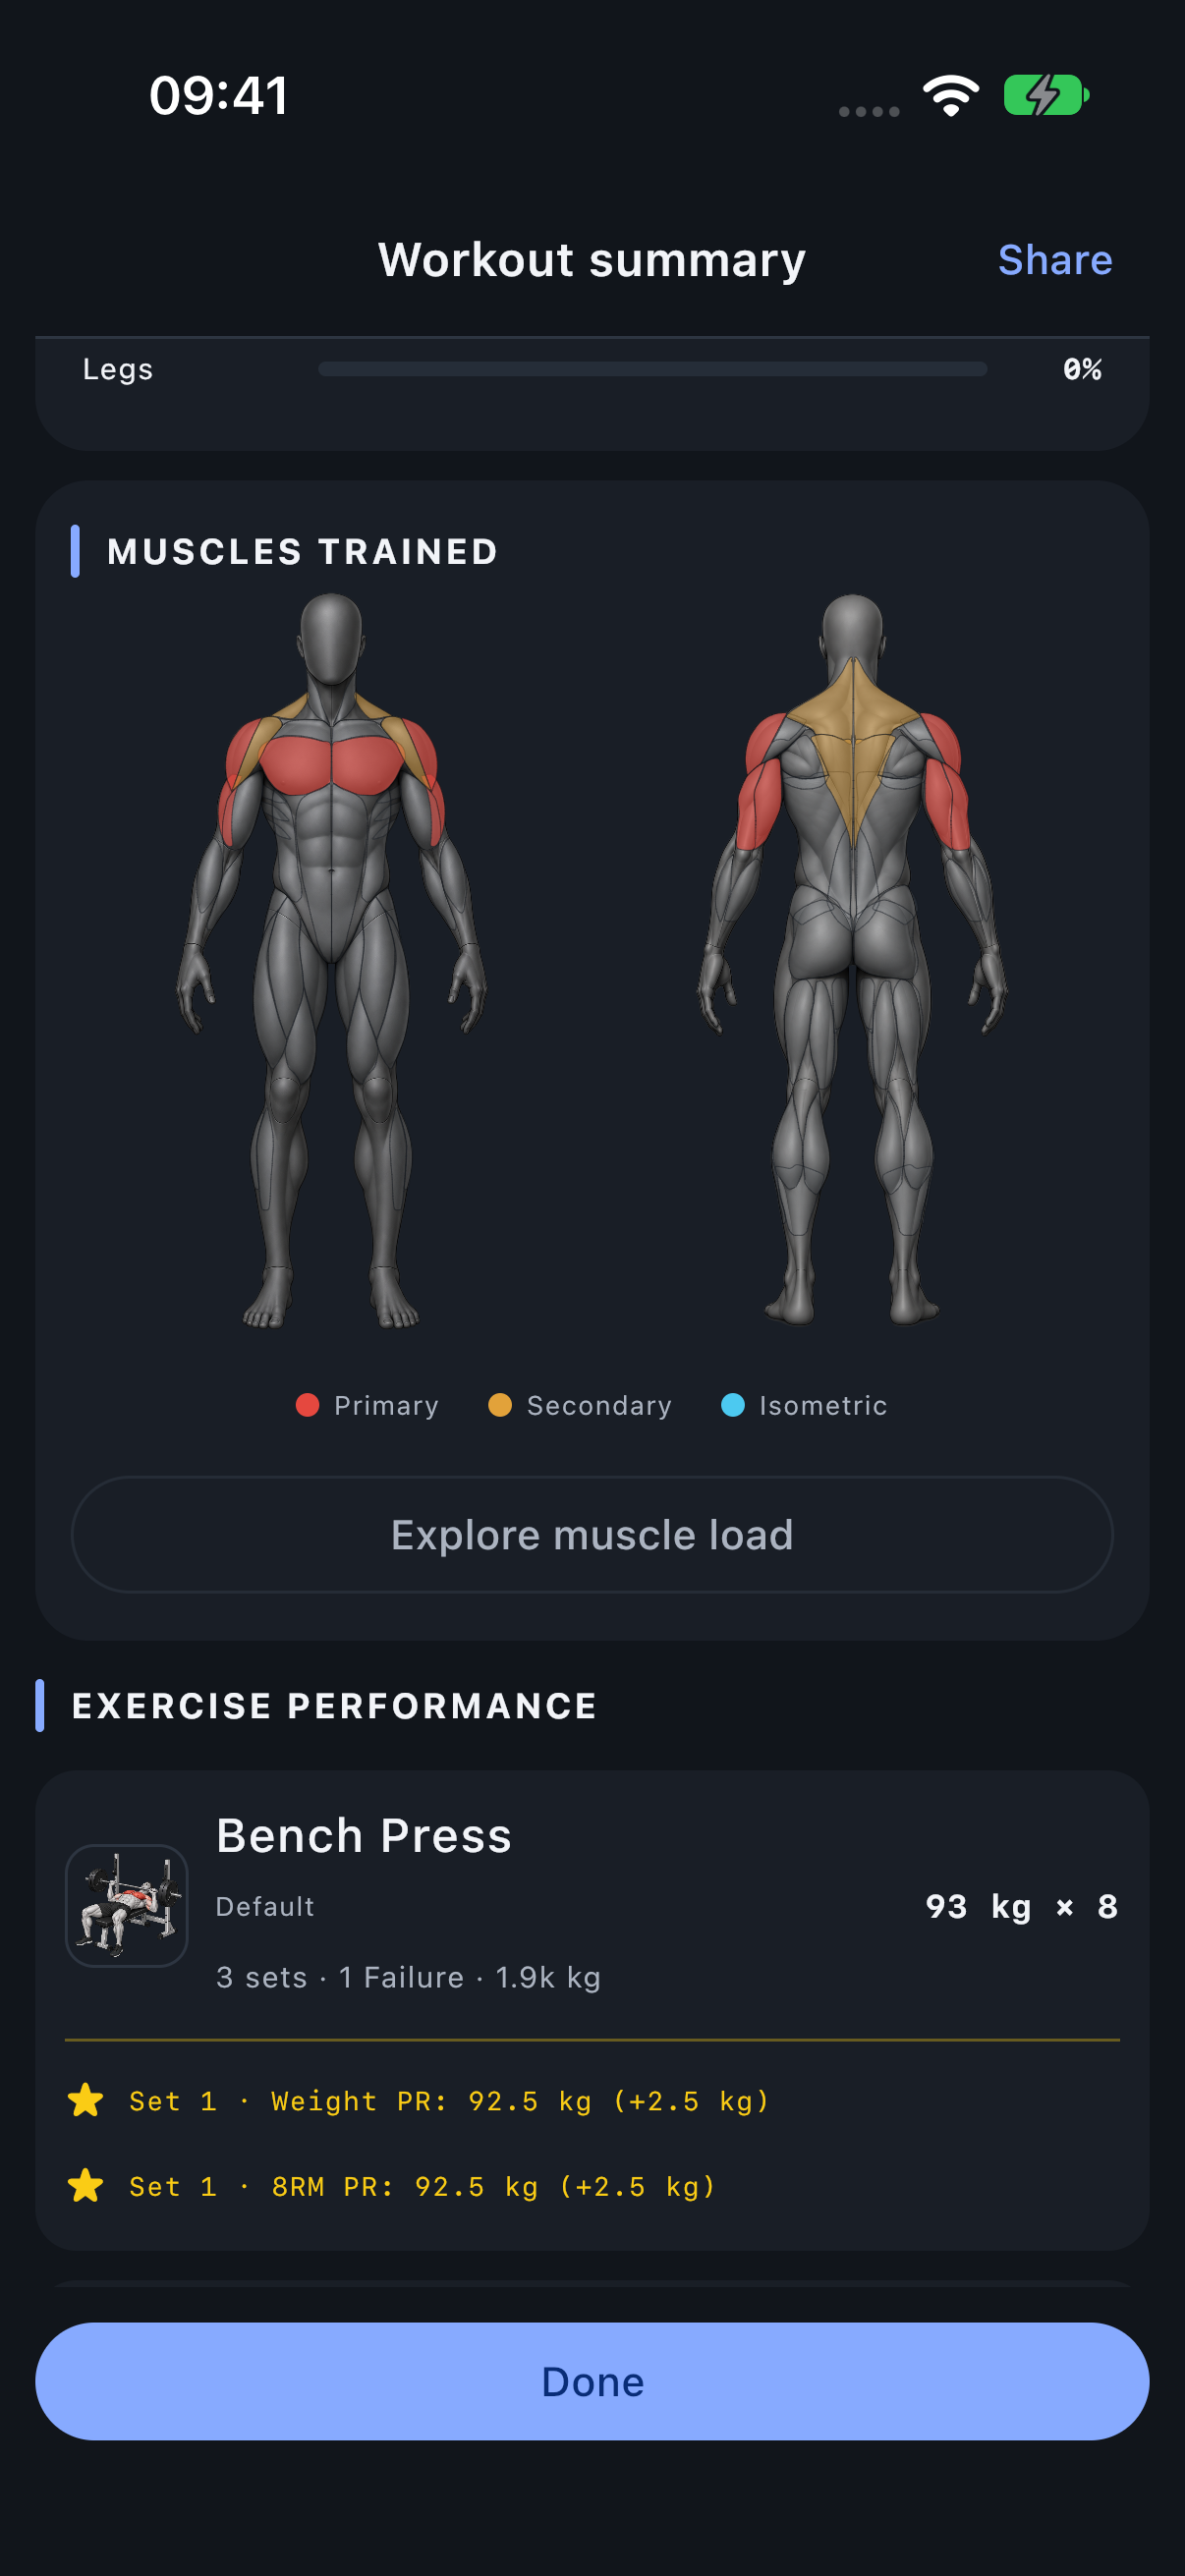
The Exercise performance cards repeat set-record explanations. A best-session-volume ★ belongs to the total completed volume for that Variant in this workout. See Personal records for the five categories.
Read historical context beside session results
Training streak uses the run of active weeks as of this workout’s finish date. It is not a count of weeks contained in one session. PR improvements also need earlier results for comparison.
Near the end, Compared with last match compares duration, working sets and volume with the most recent earlier workout containing the same combination of Variants, after any canonical merge mapping. It does not select a match only because the workout names agree. Different set counts or results can still be compared.
If the matched earlier workout contained nine working sets and today has ten, Working sets shows +1. A positive volume difference can come from that extra set, not only a heavier load. Read the earlier date shown in the comparison.
Read the movement overview and matrix
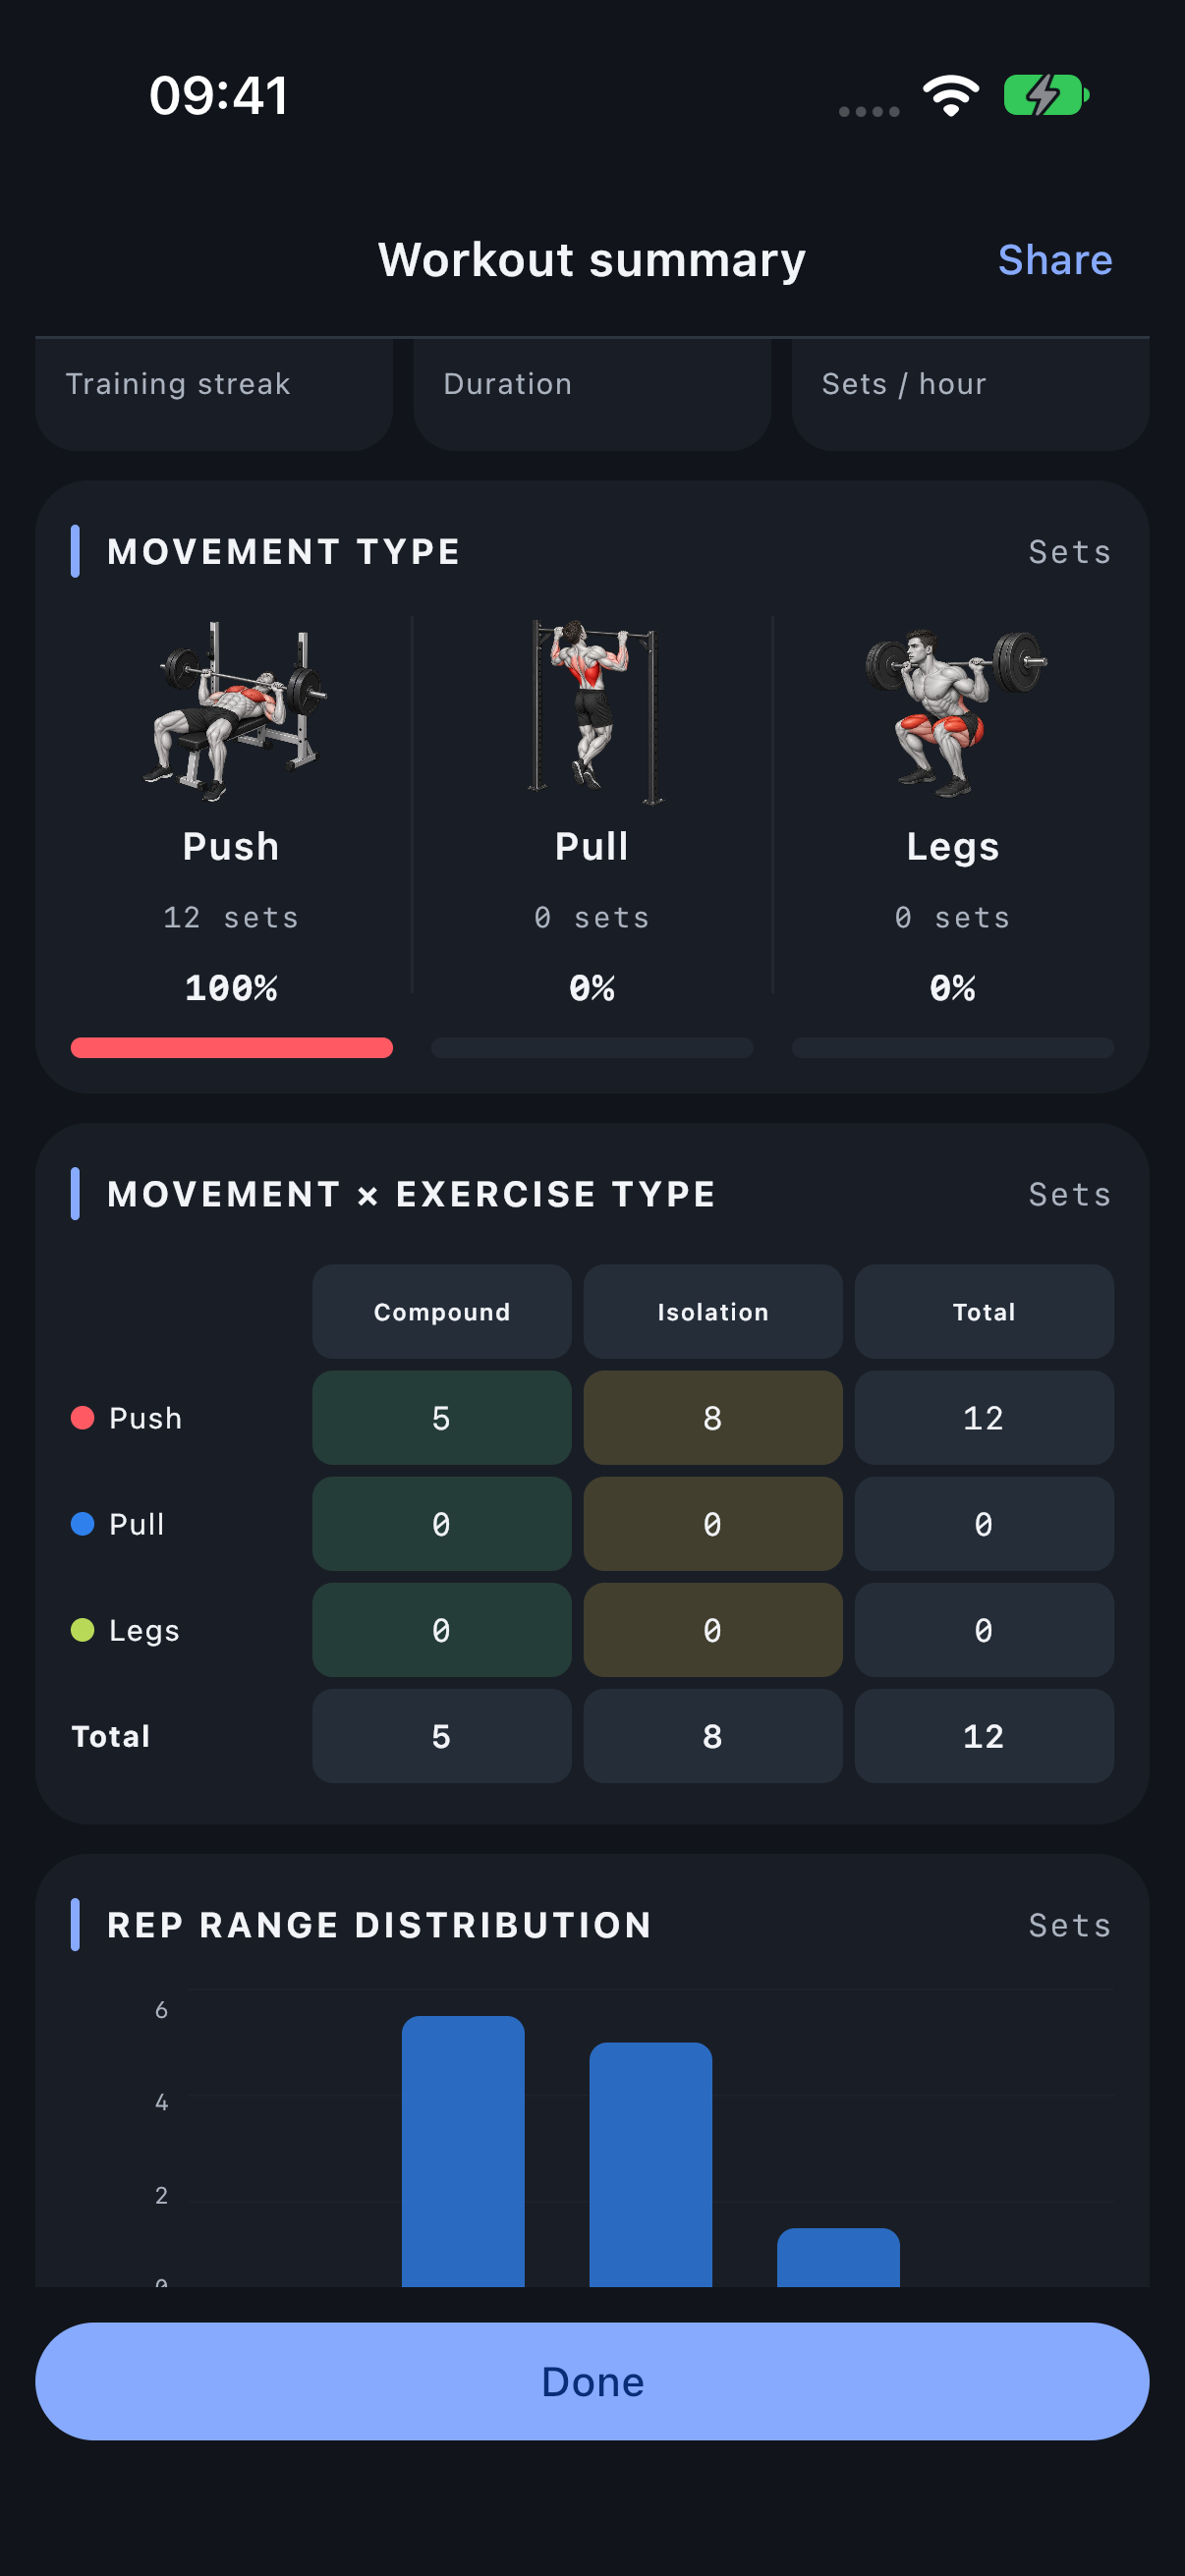
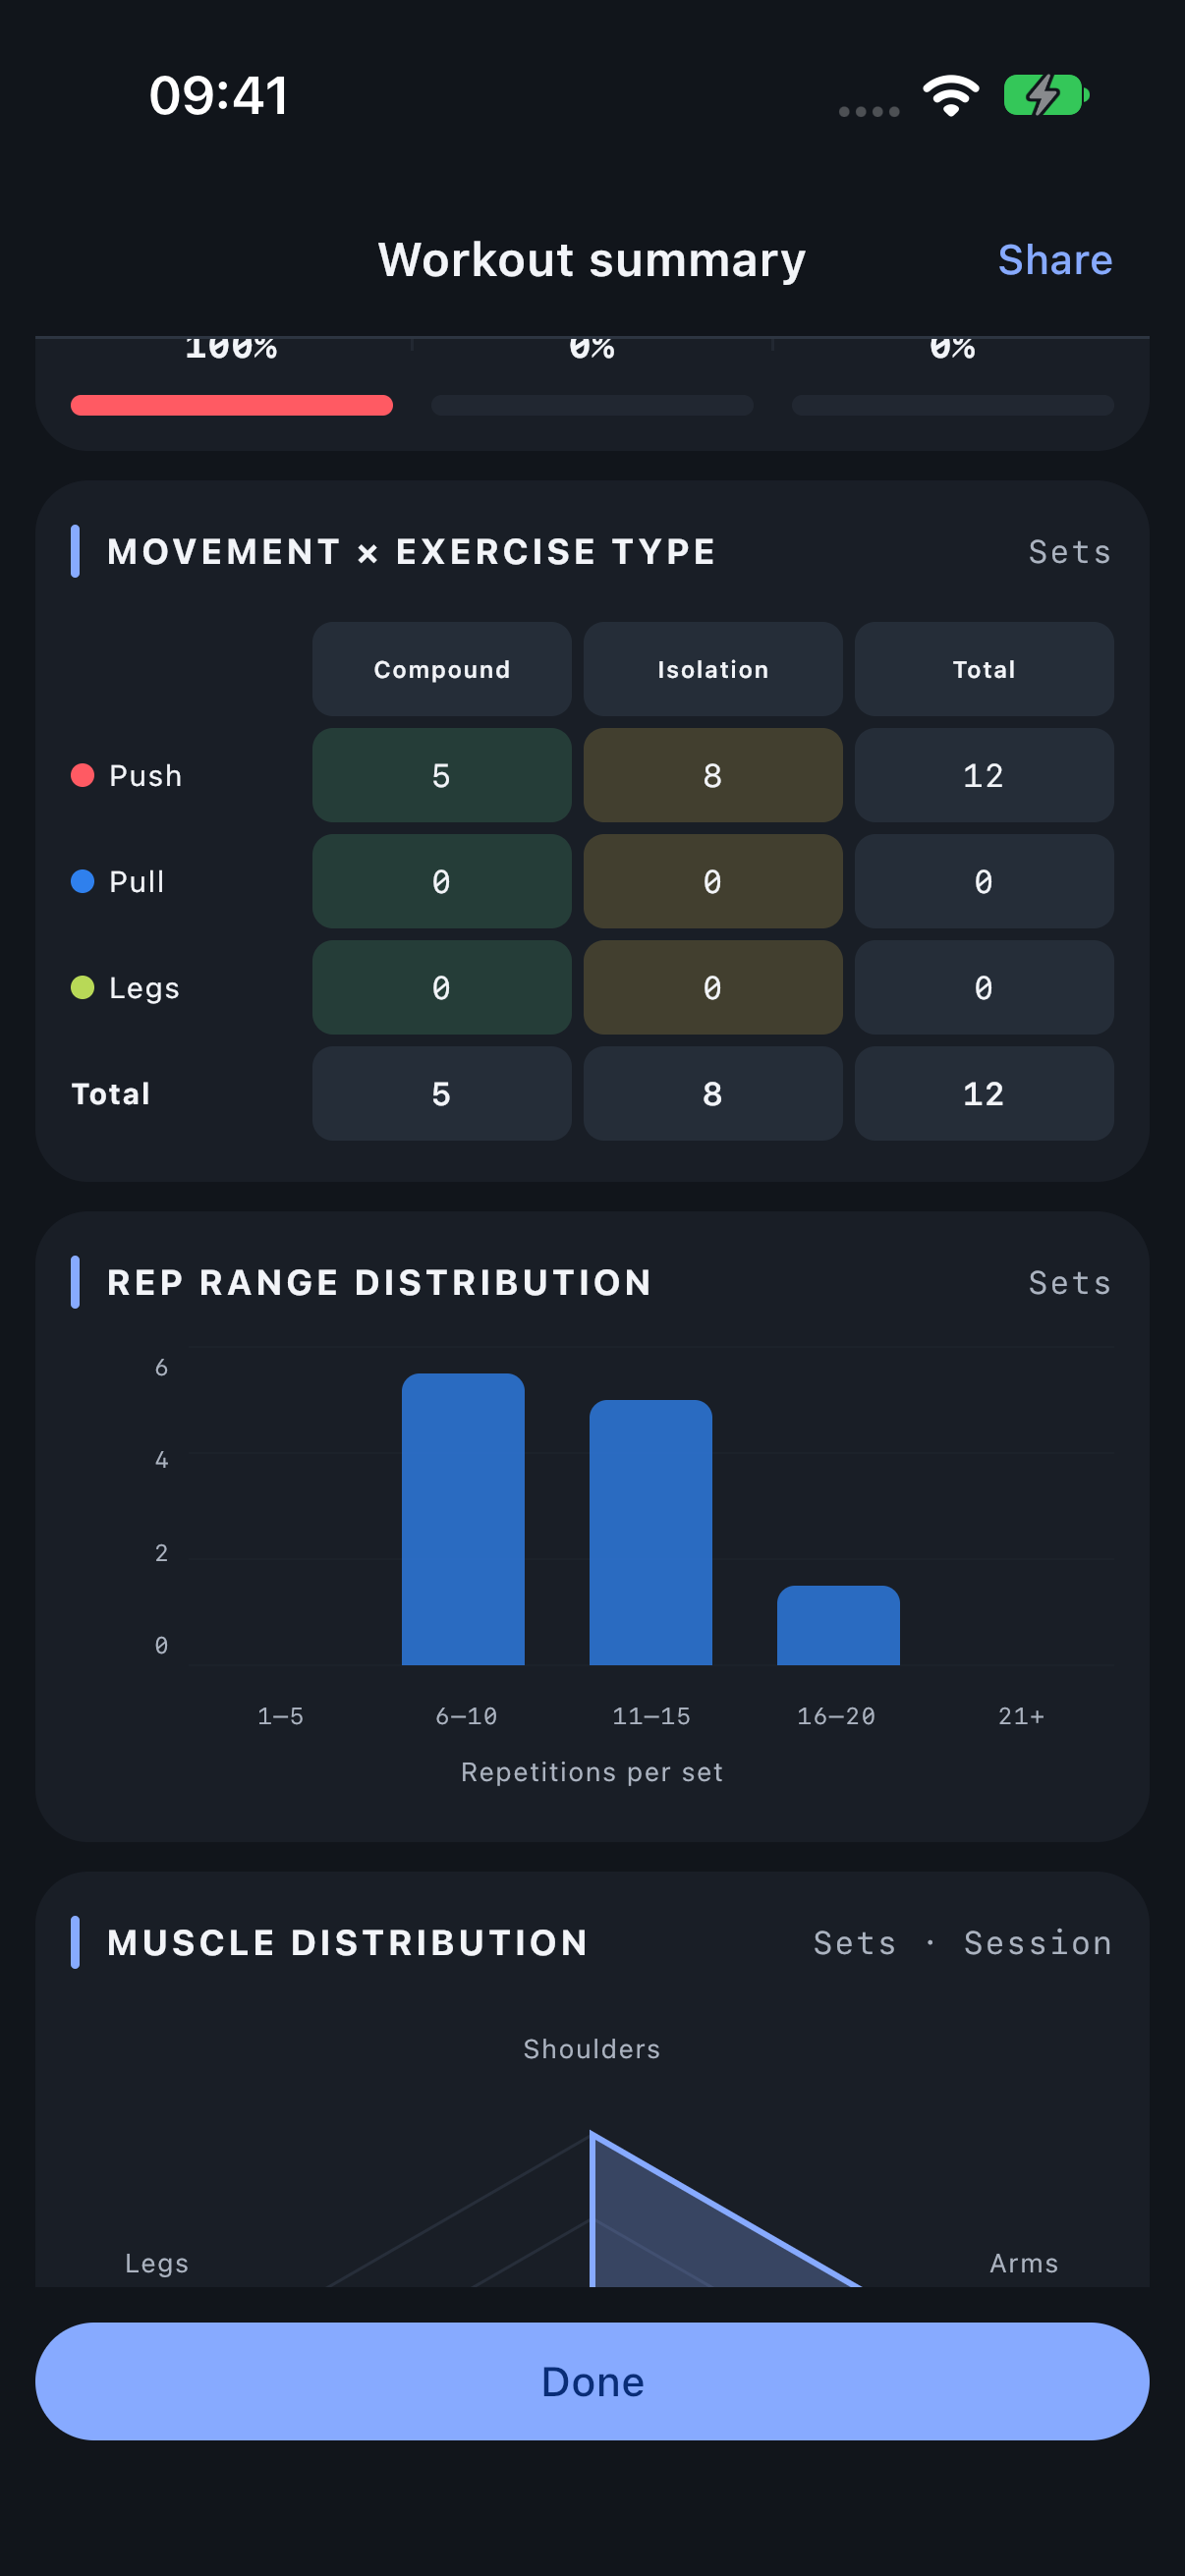
The icon-based Movement type card shows this workout’s Push/Pull/Legs work. The matrix immediately after it divides those movements into Compound and Isolation. Use the row and column headings to understand the composition of this one session.
Check the session’s combinations
A session with compound presses and isolation raises can contain both Push × Compound and Push × Isolation work. The matrix gives their role-weighted session contributions without requiring a separate global-period filter. For example, three physical sets with Primary and Secondary involvement contribute 4.5 under the Combined weighting; they are still three actual sets in the headline.
Review the actual rep distribution
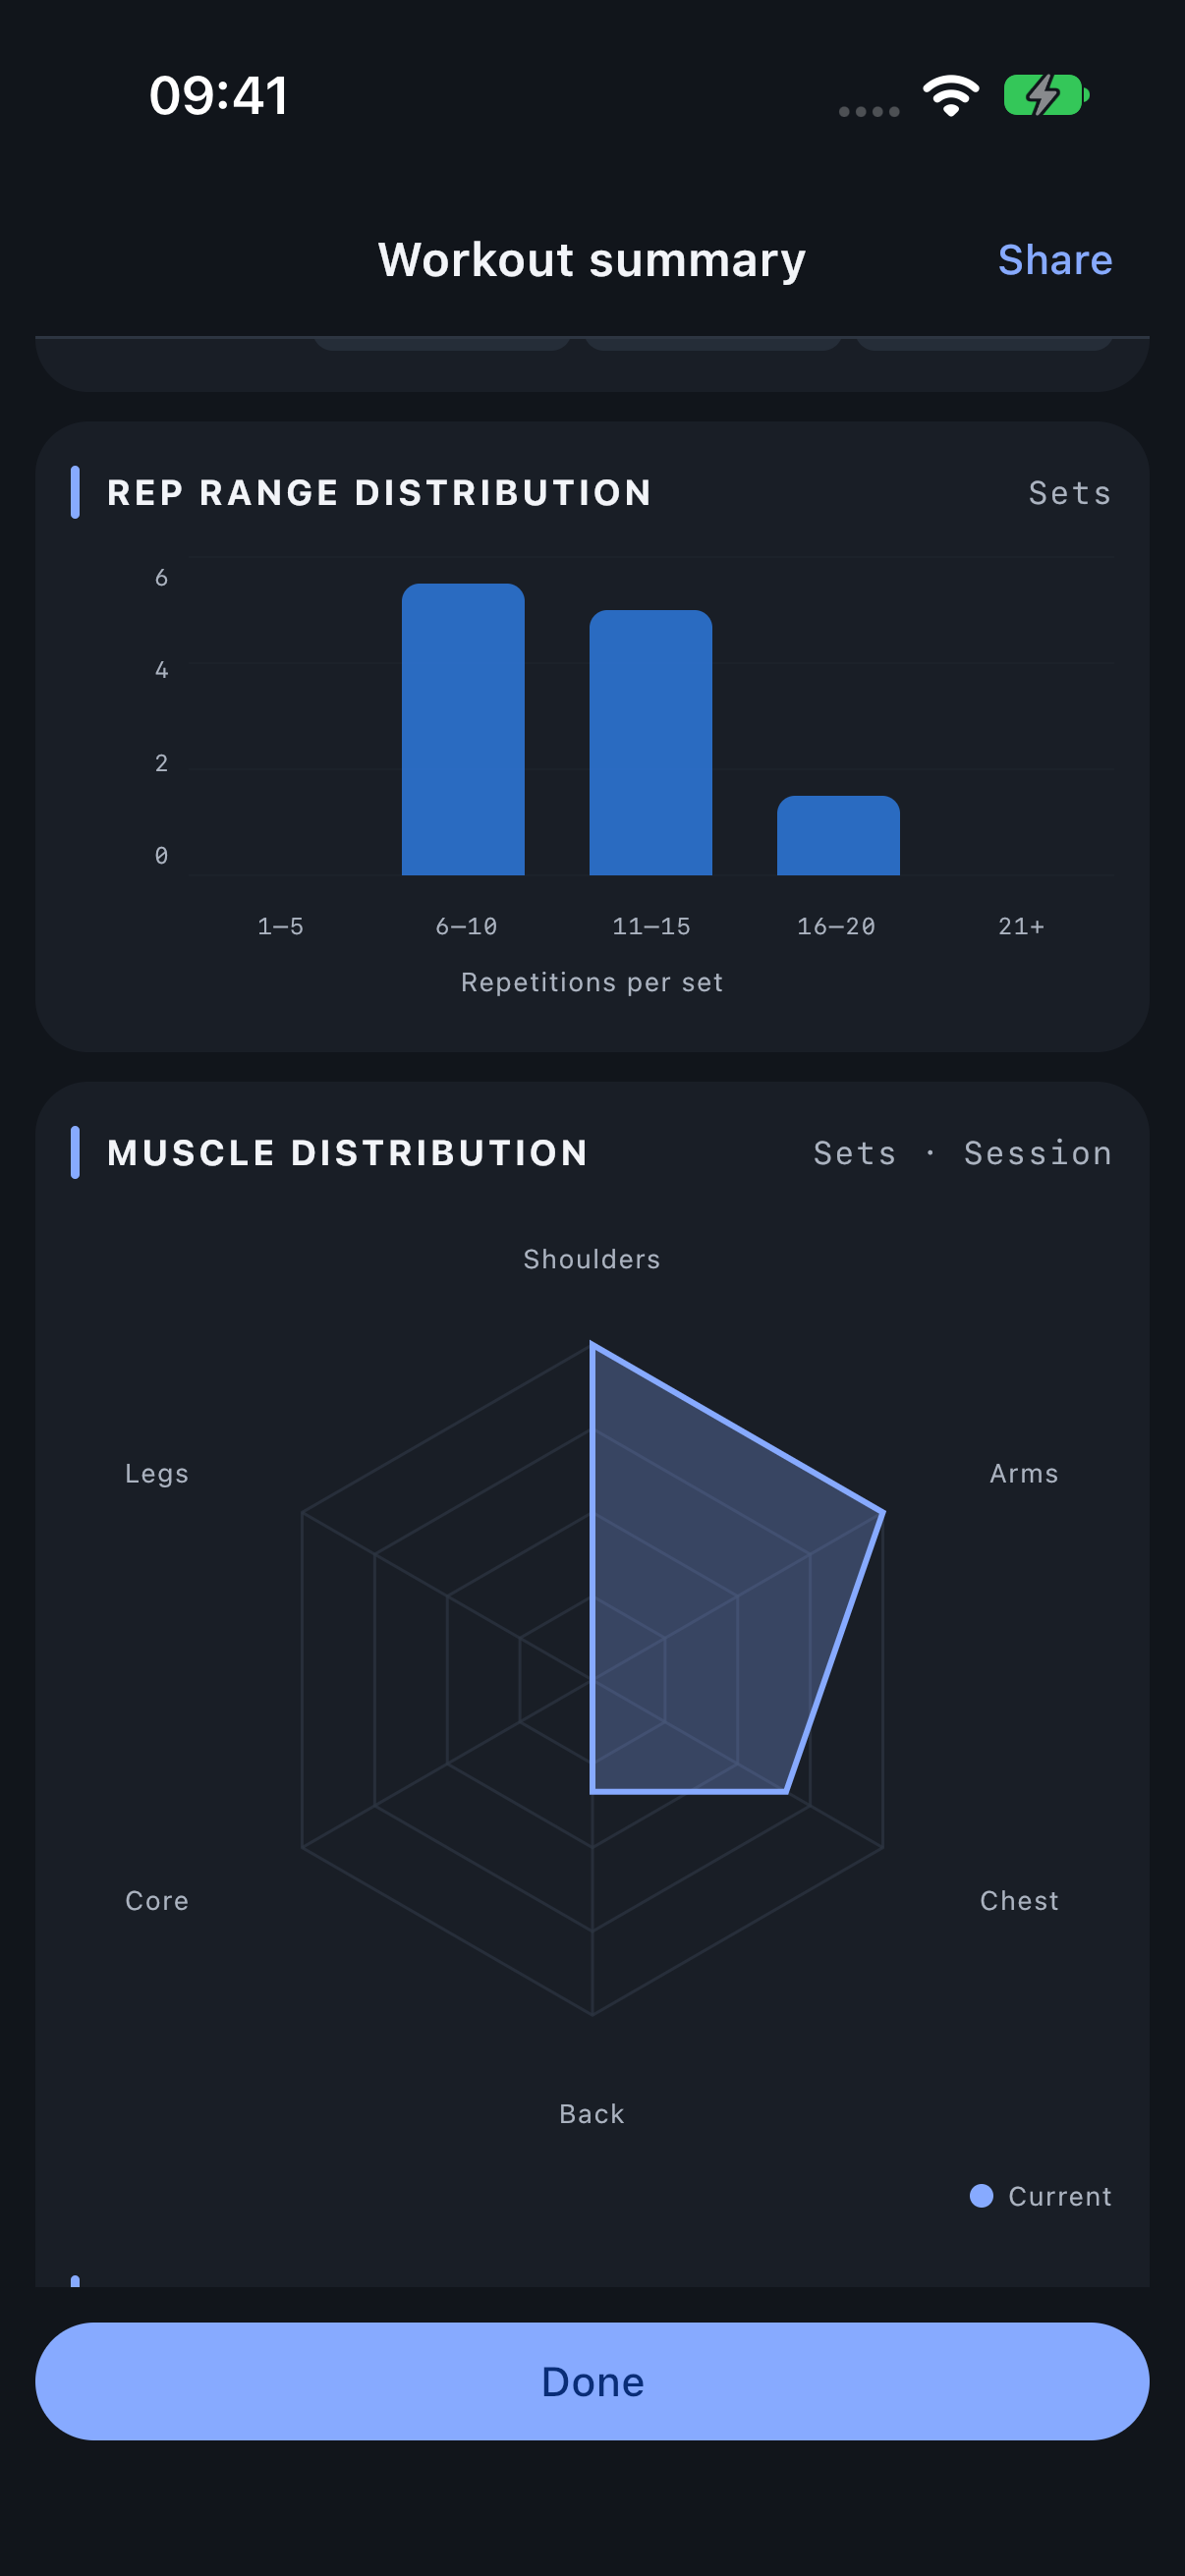
The histogram groups the successful rep counts logged in this workout. It is useful for checking whether the completed work stayed in the ranges you intended. It describes Actual, not template target ranges.
Read session muscle distribution
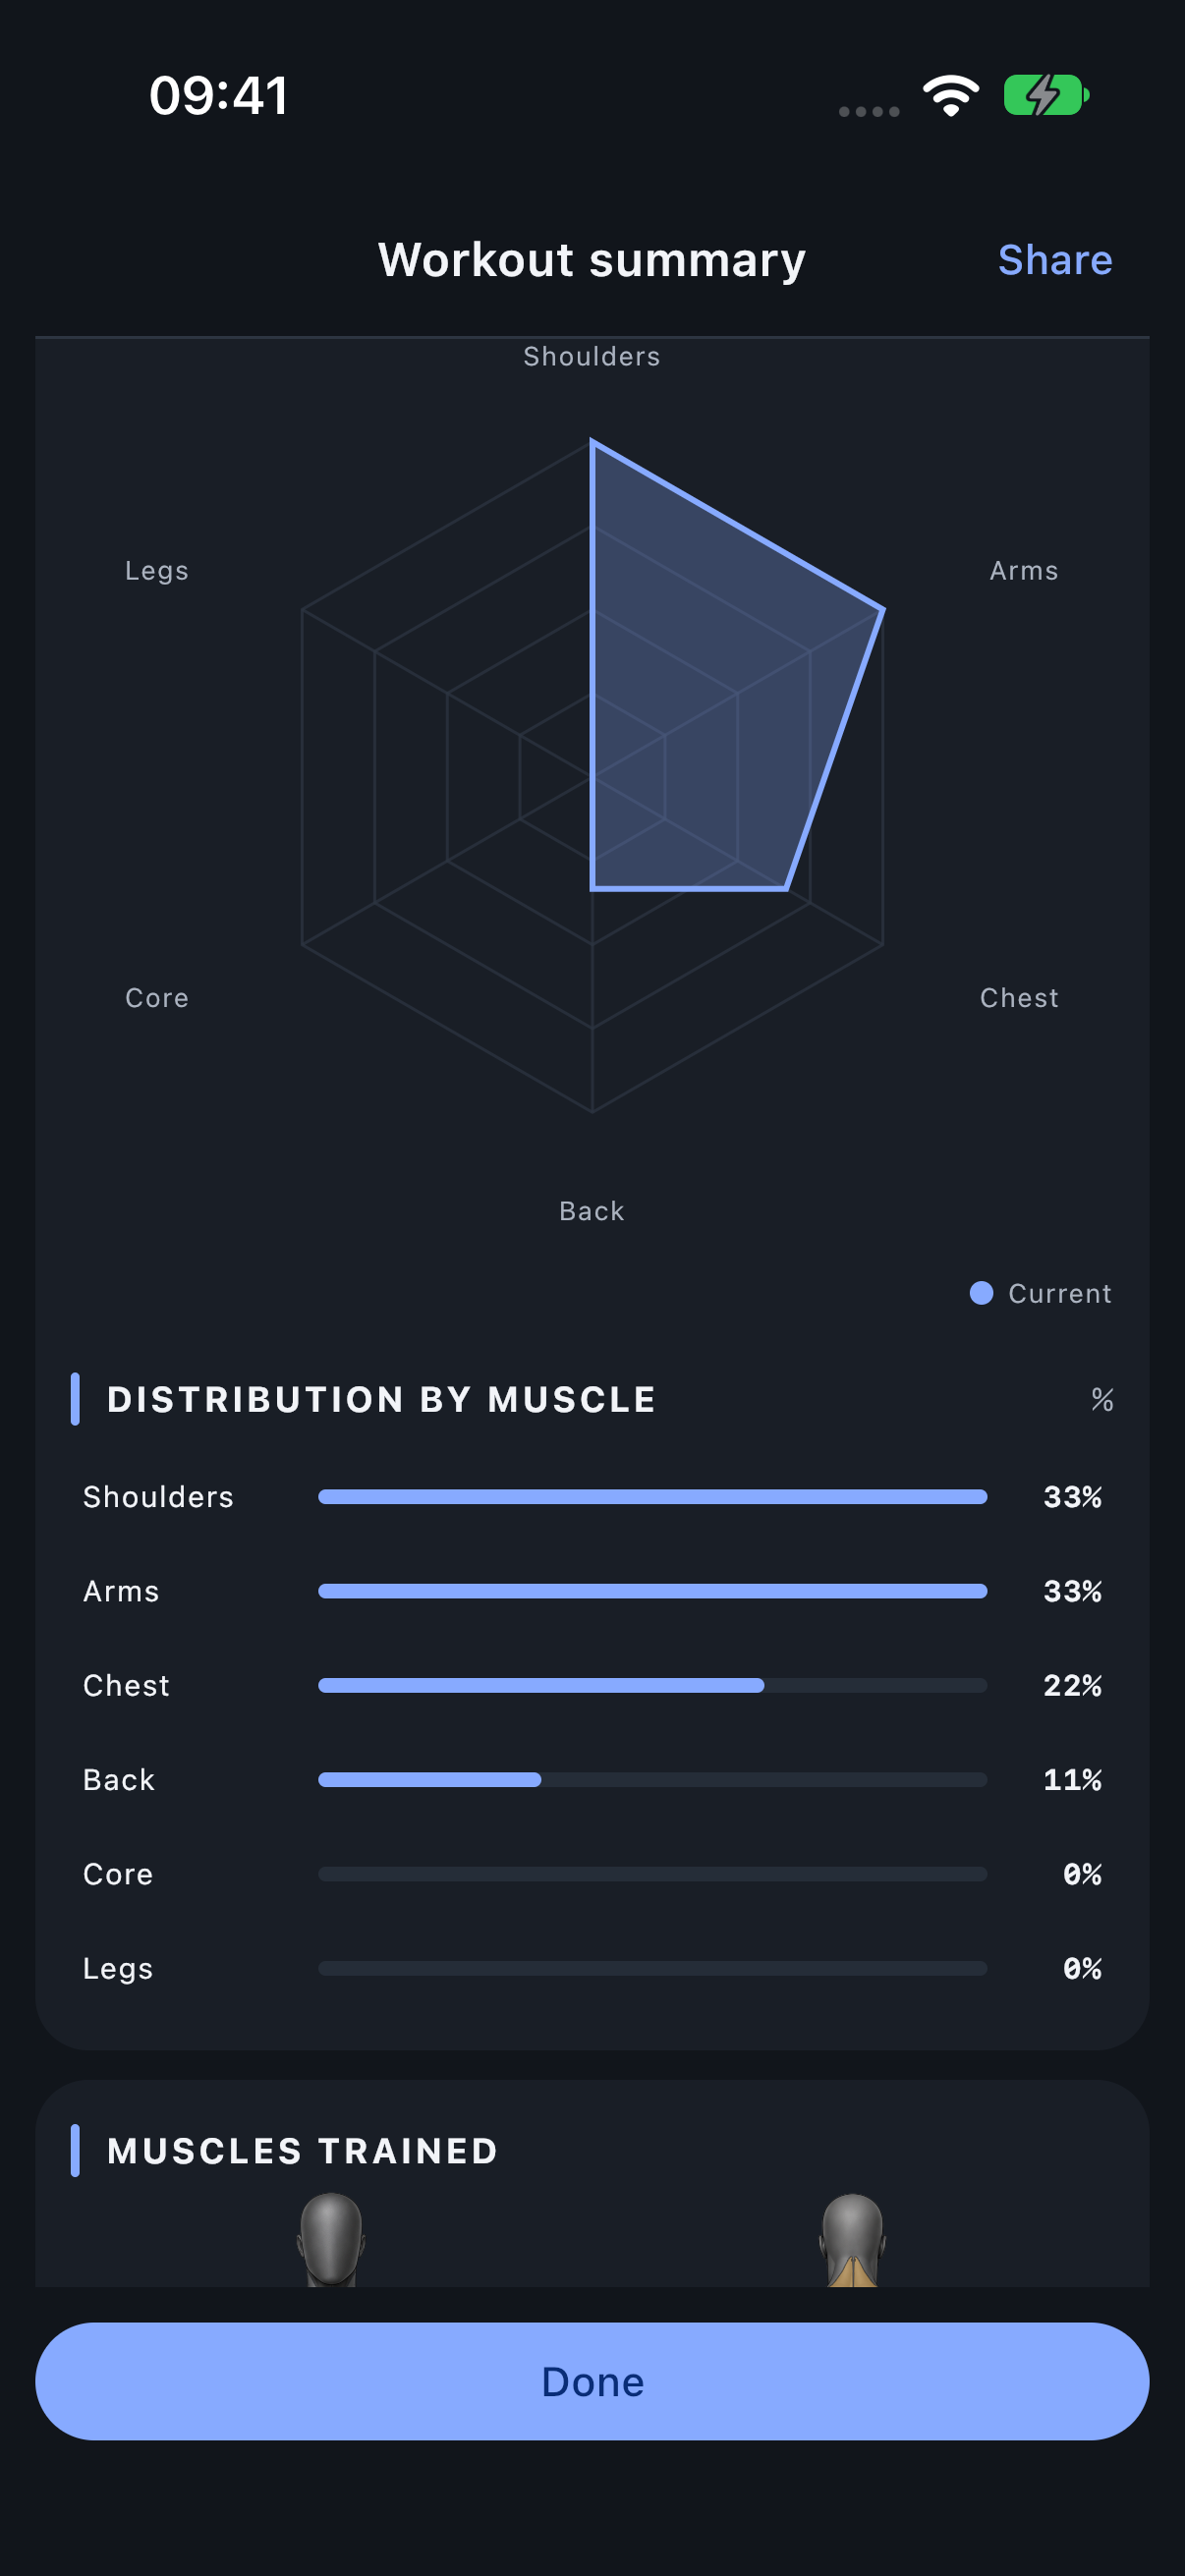
The radar and percentage rows describe the share of muscle contribution in this session. Use them with the numeric values rather than treating the polygon as a strength score. Their meaning matches the distribution reference, but the scope is this workout.
Read the session’s percentage rows
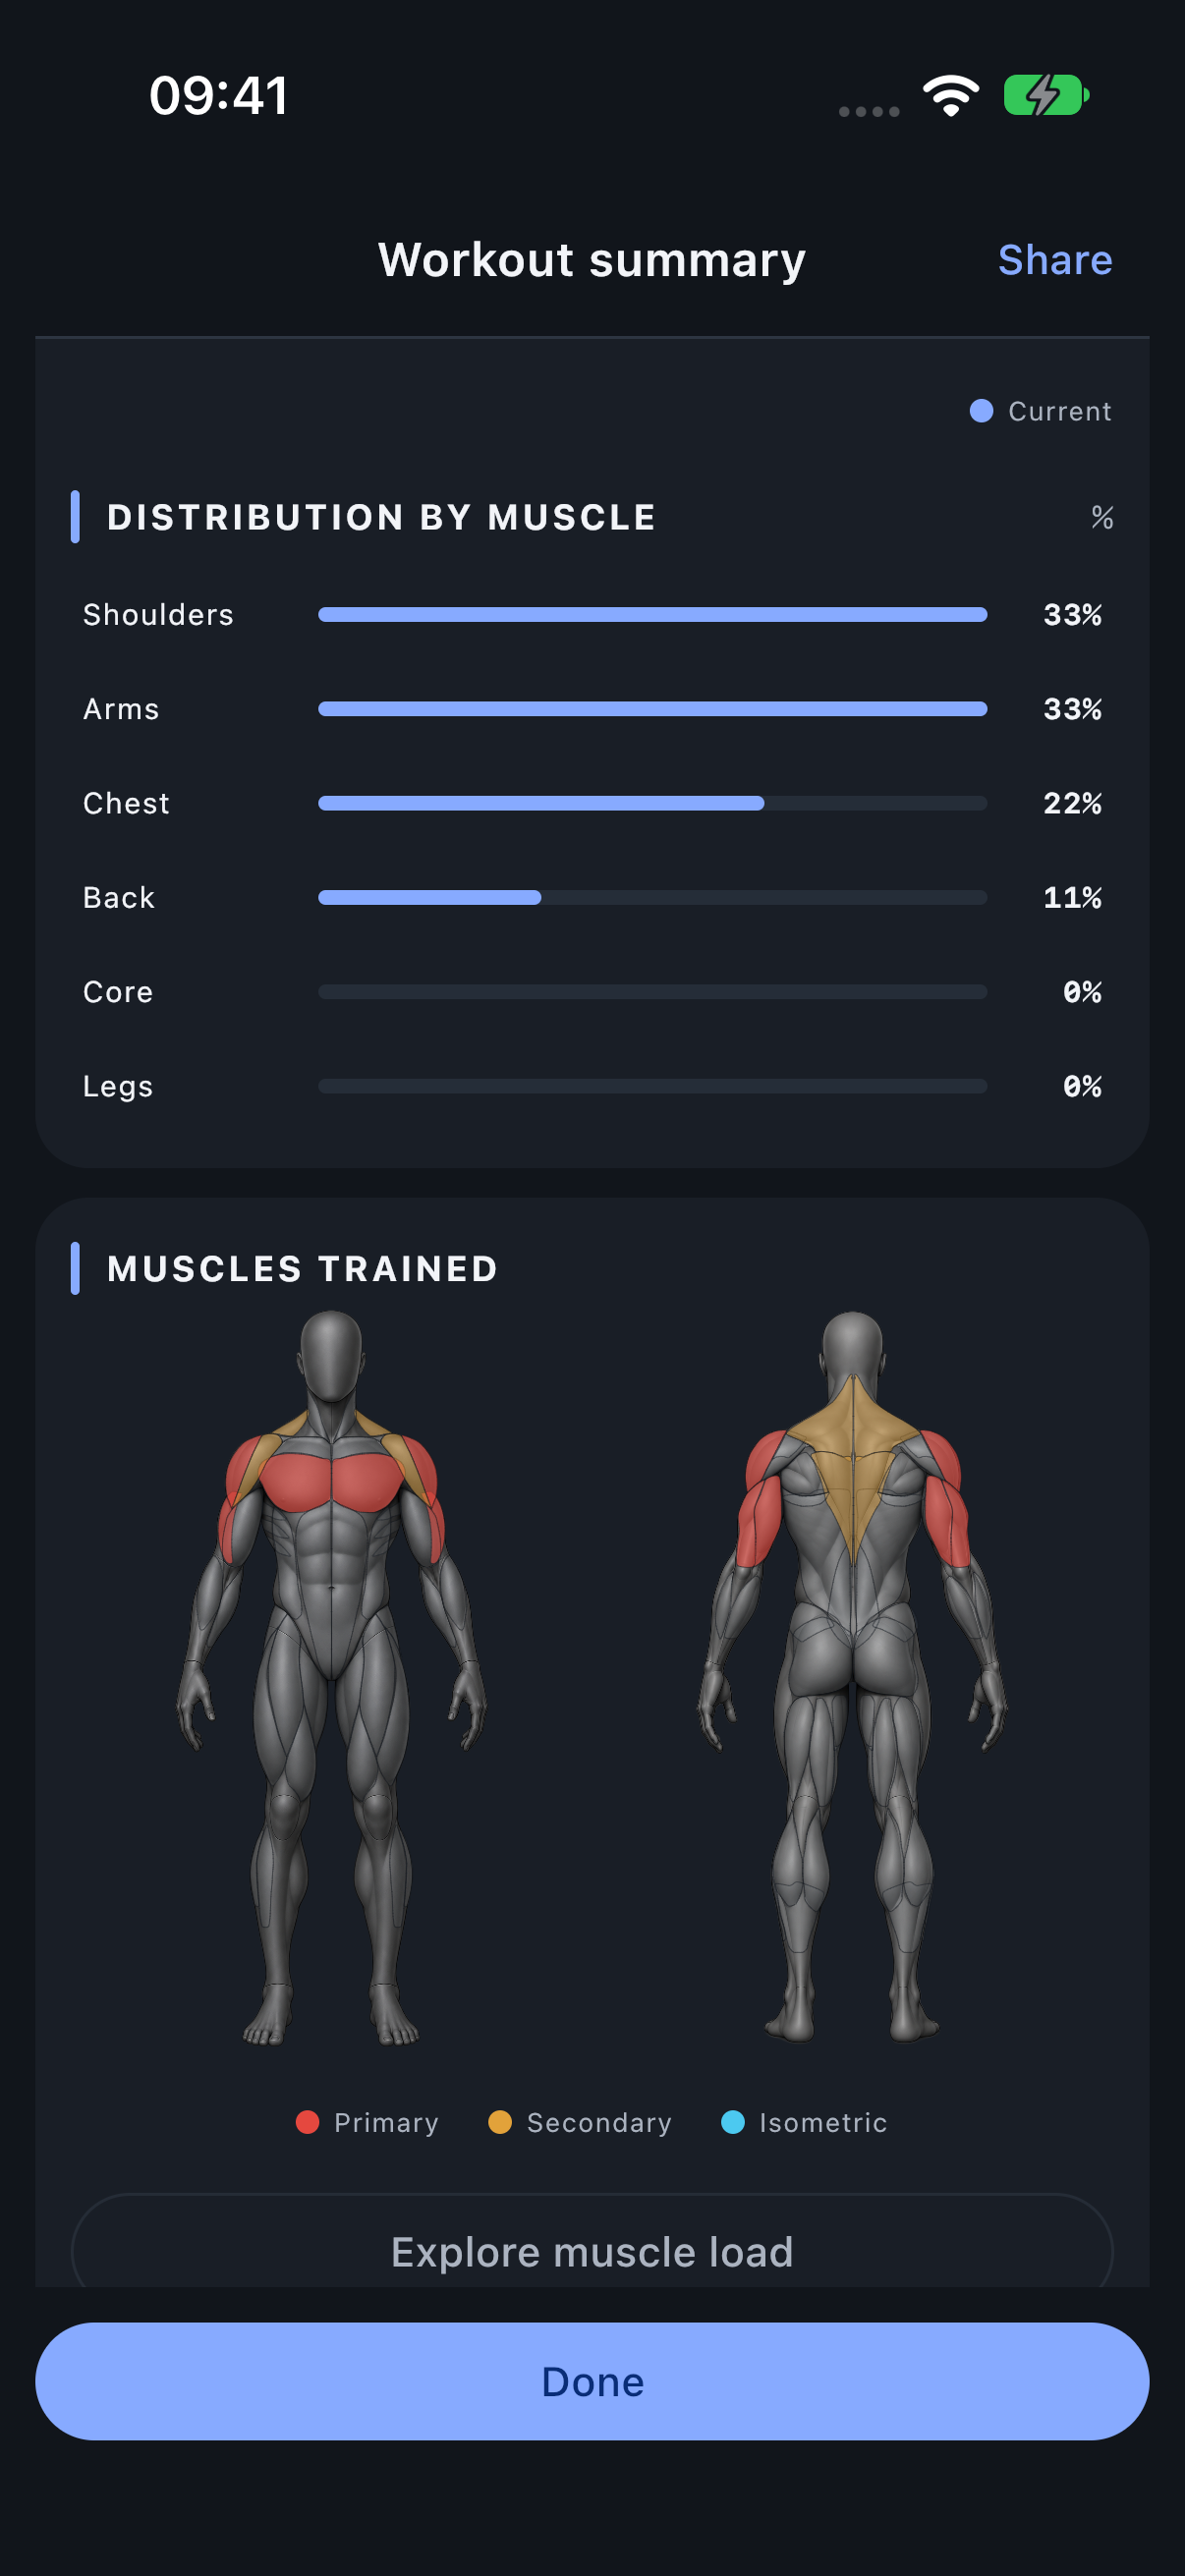
Distribution by muscle gives the exact rounded contribution shares behind the radar. The longest line is relative to the largest displayed share, not automatically 100%. Read these as the breakdown of this workout.
Inspect the muscles trained
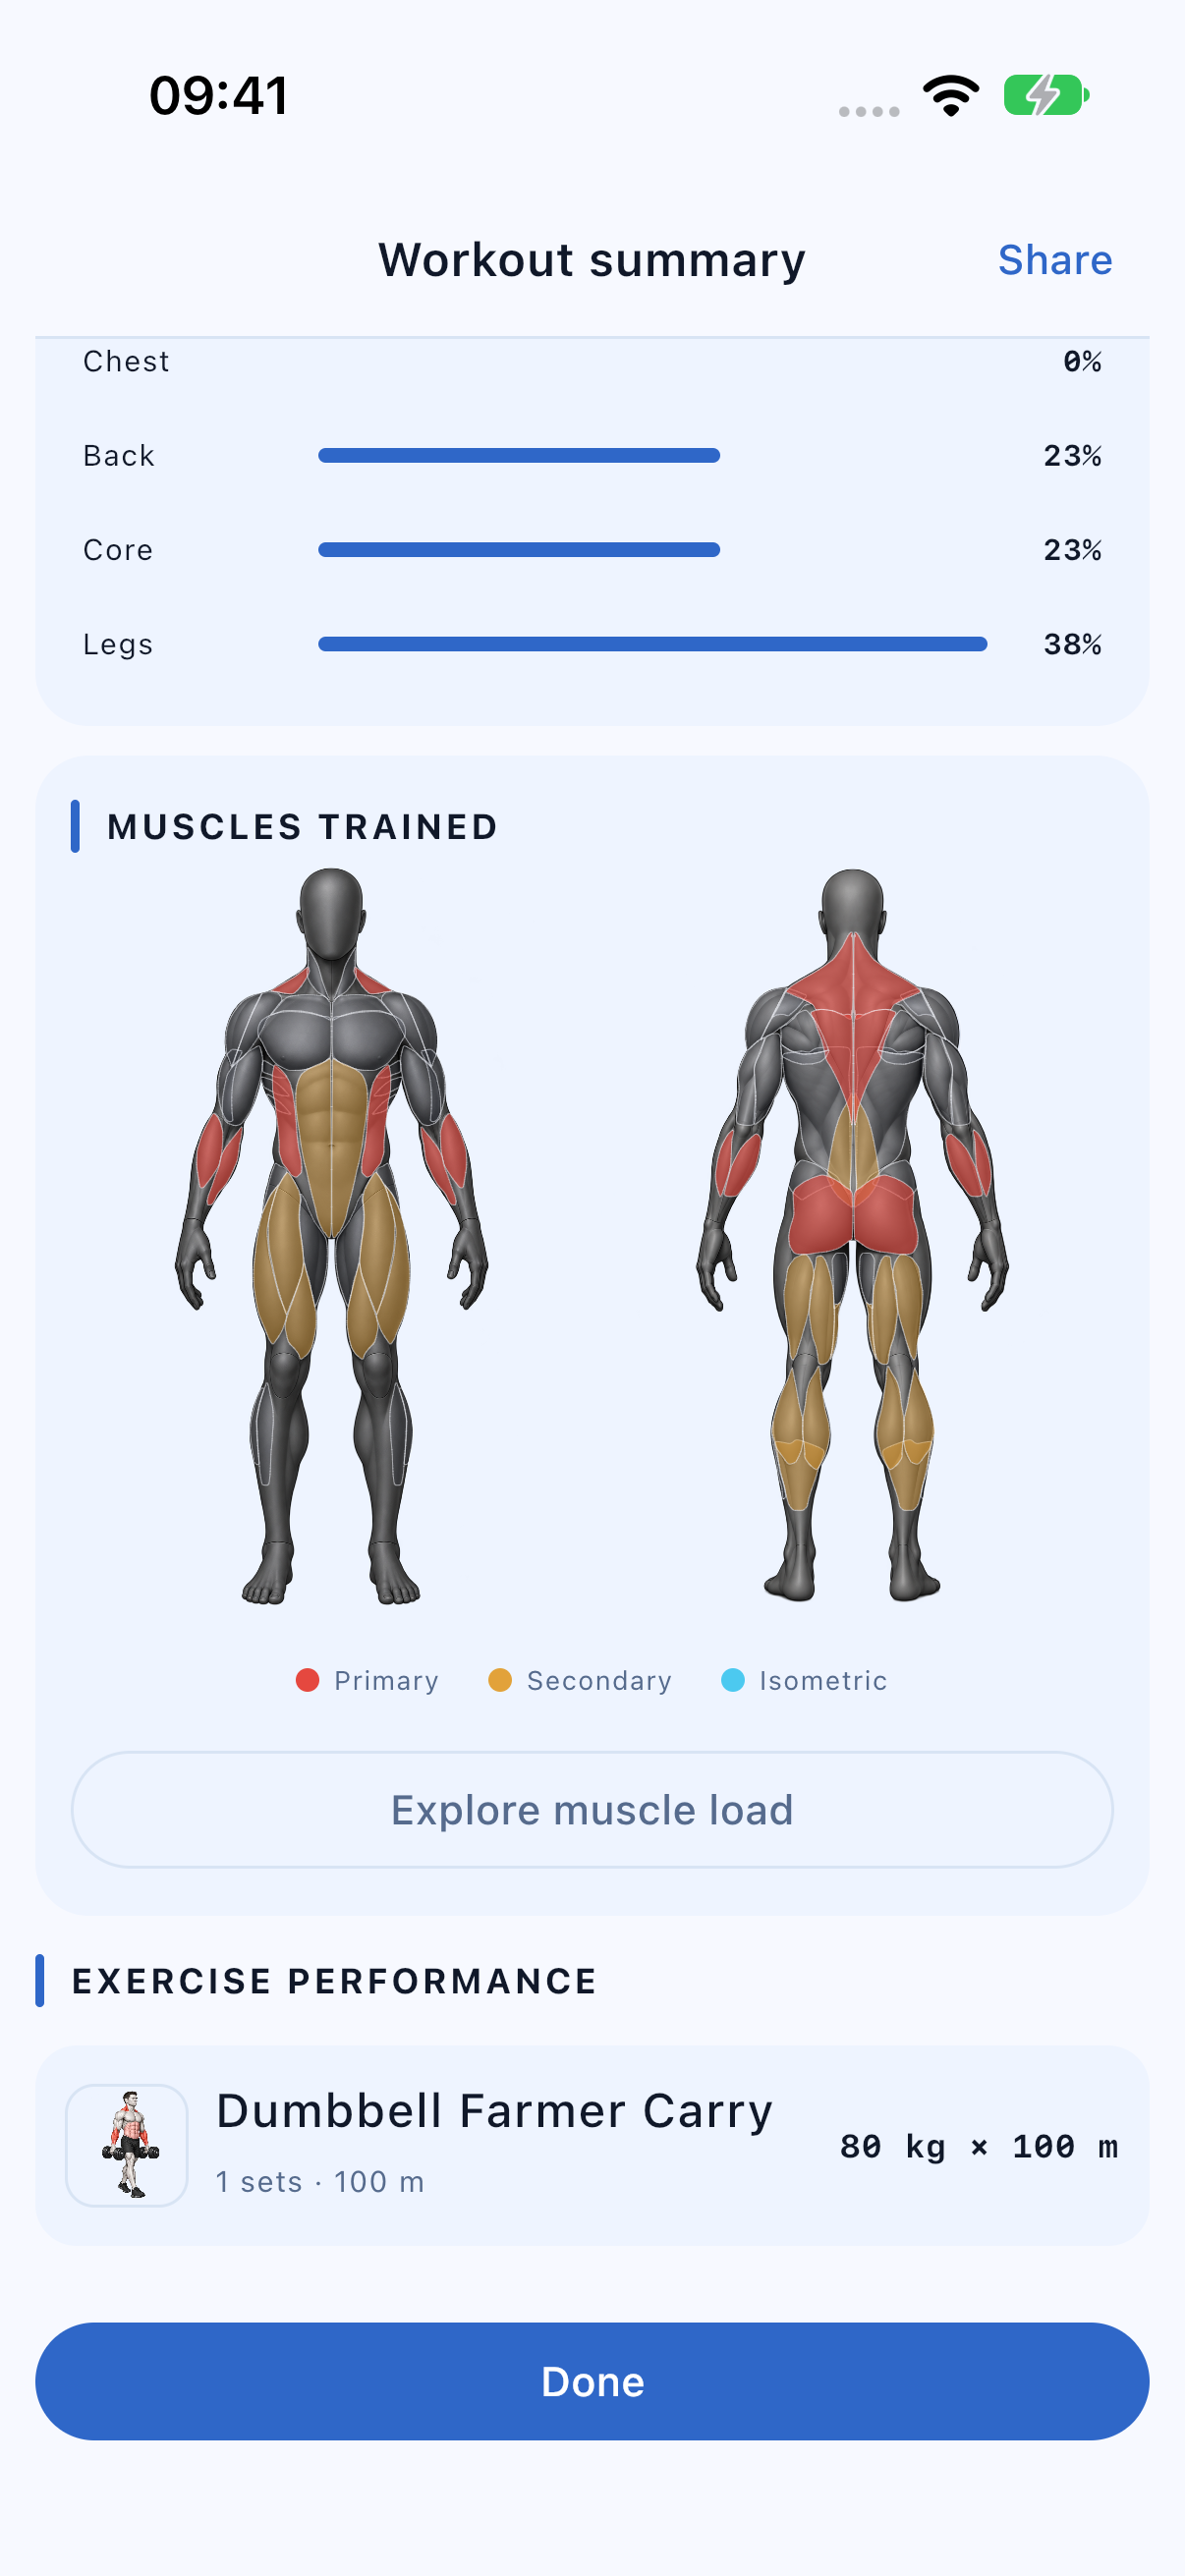
The muscles-trained map locates the regions involved in the workout. Its fixed colours identify Primary (red), Secondary (amber) and Isometric (cyan), rather than the blue-to-red amount scale used by Muscle activity in Statistics. It complements the distribution chart: the chart compares contribution shares, while the map shows where that involvement is located. Review the Exercise cards below it for the actual performances.
Read distance and time results
Exercise performance shows each movement in its recorded units. A carry can show 80 kg × 100 m, with the total distance below its name. A timed hold shows its duration and its load when recorded. These working sets also contribute to the session’s muscle map and set distribution.
Explore the session’s muscle load
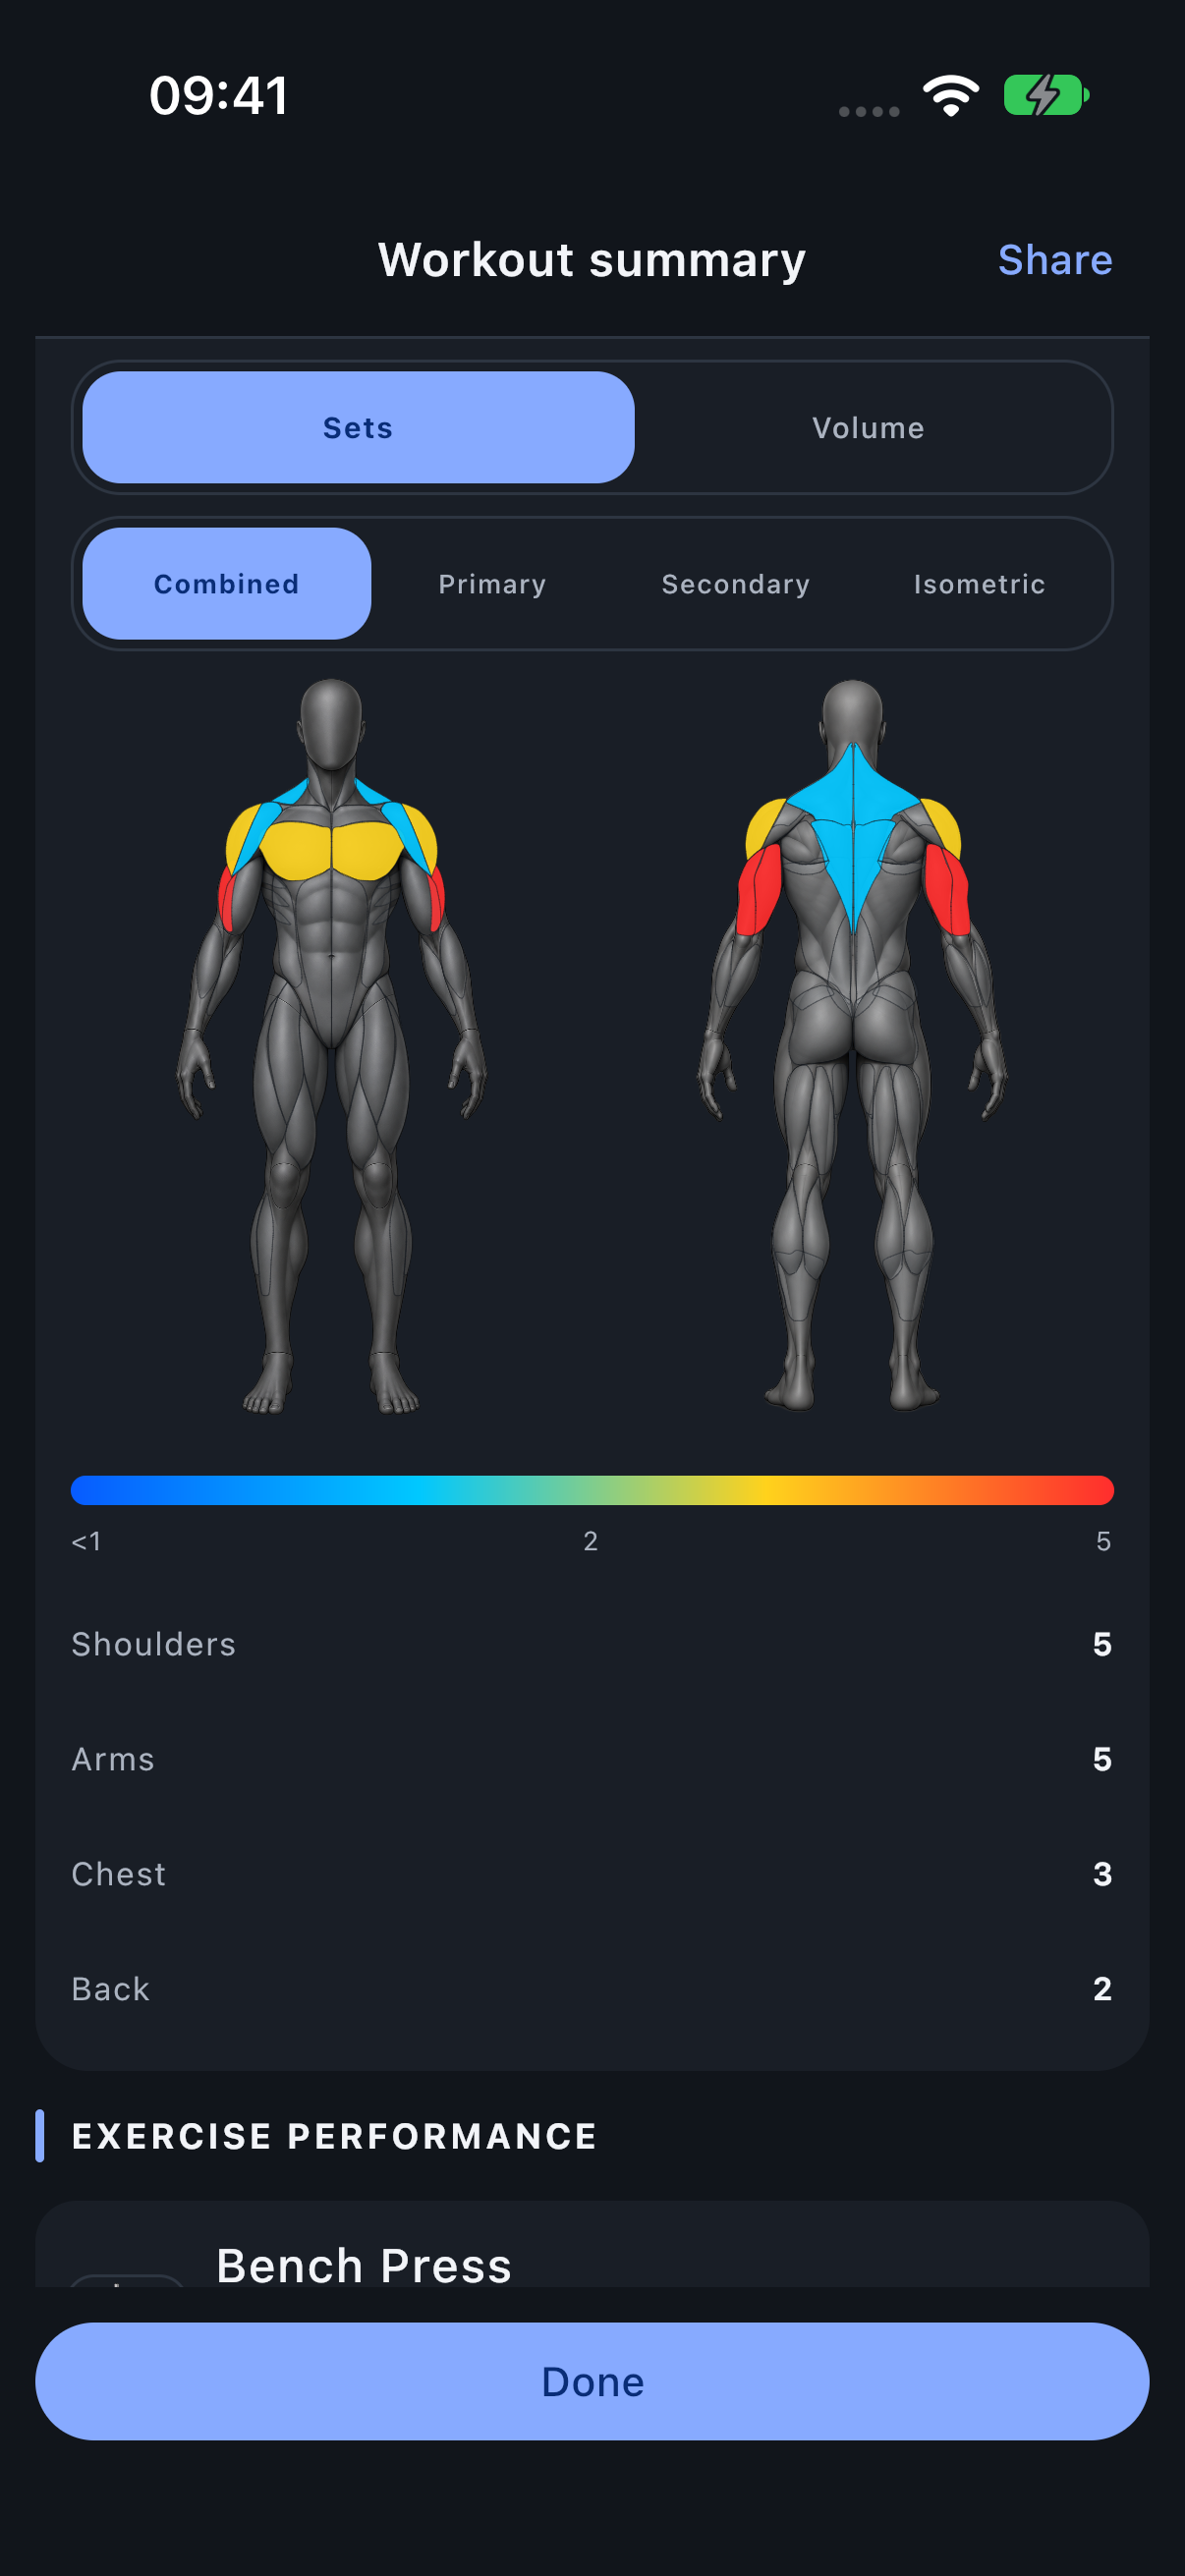
- Under Muscles trained, choose Explore muscle load.
- Choose Sets or Volume and Combined, Primary, Secondary or Isometric.
- Read the expanded workload map, scale and group totals.
- Choose Hide muscle load to collapse the detail again.
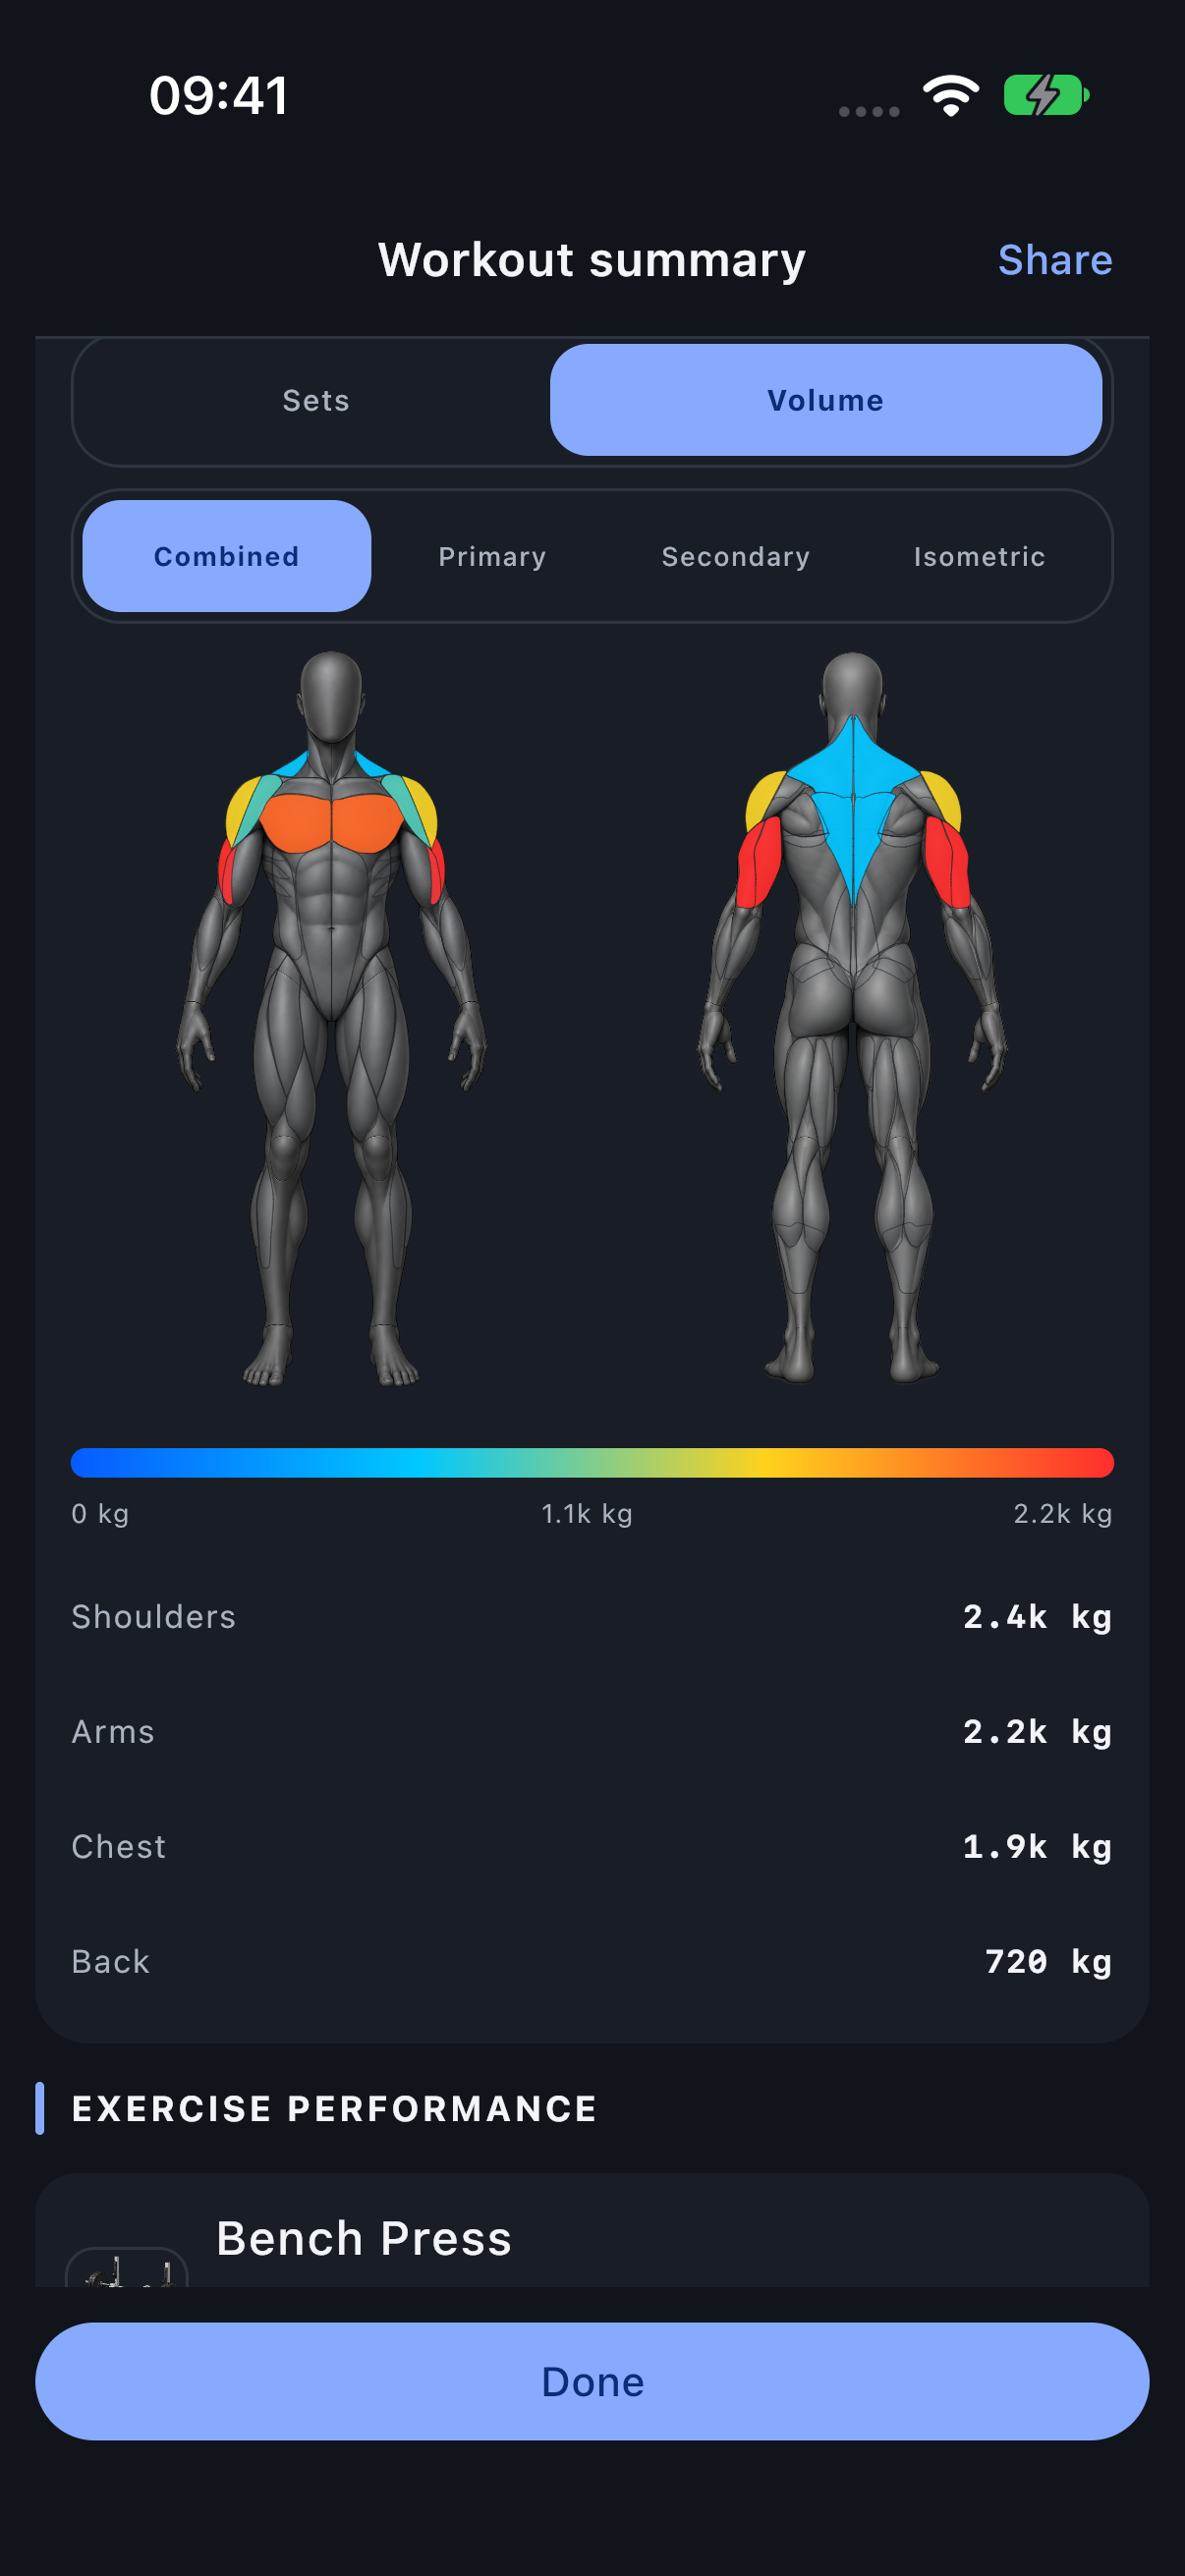
These controls belong to the expanded detail for this session. The workload gradient describes an amount; the fixed-role figure above it still identifies involvement roles.
Read the session load in volume
Volume attributes effective load × successful reps to the selected muscle roles. Its unit and scale differ from Sets even though the body regions remain the same.
Share selected summary modules
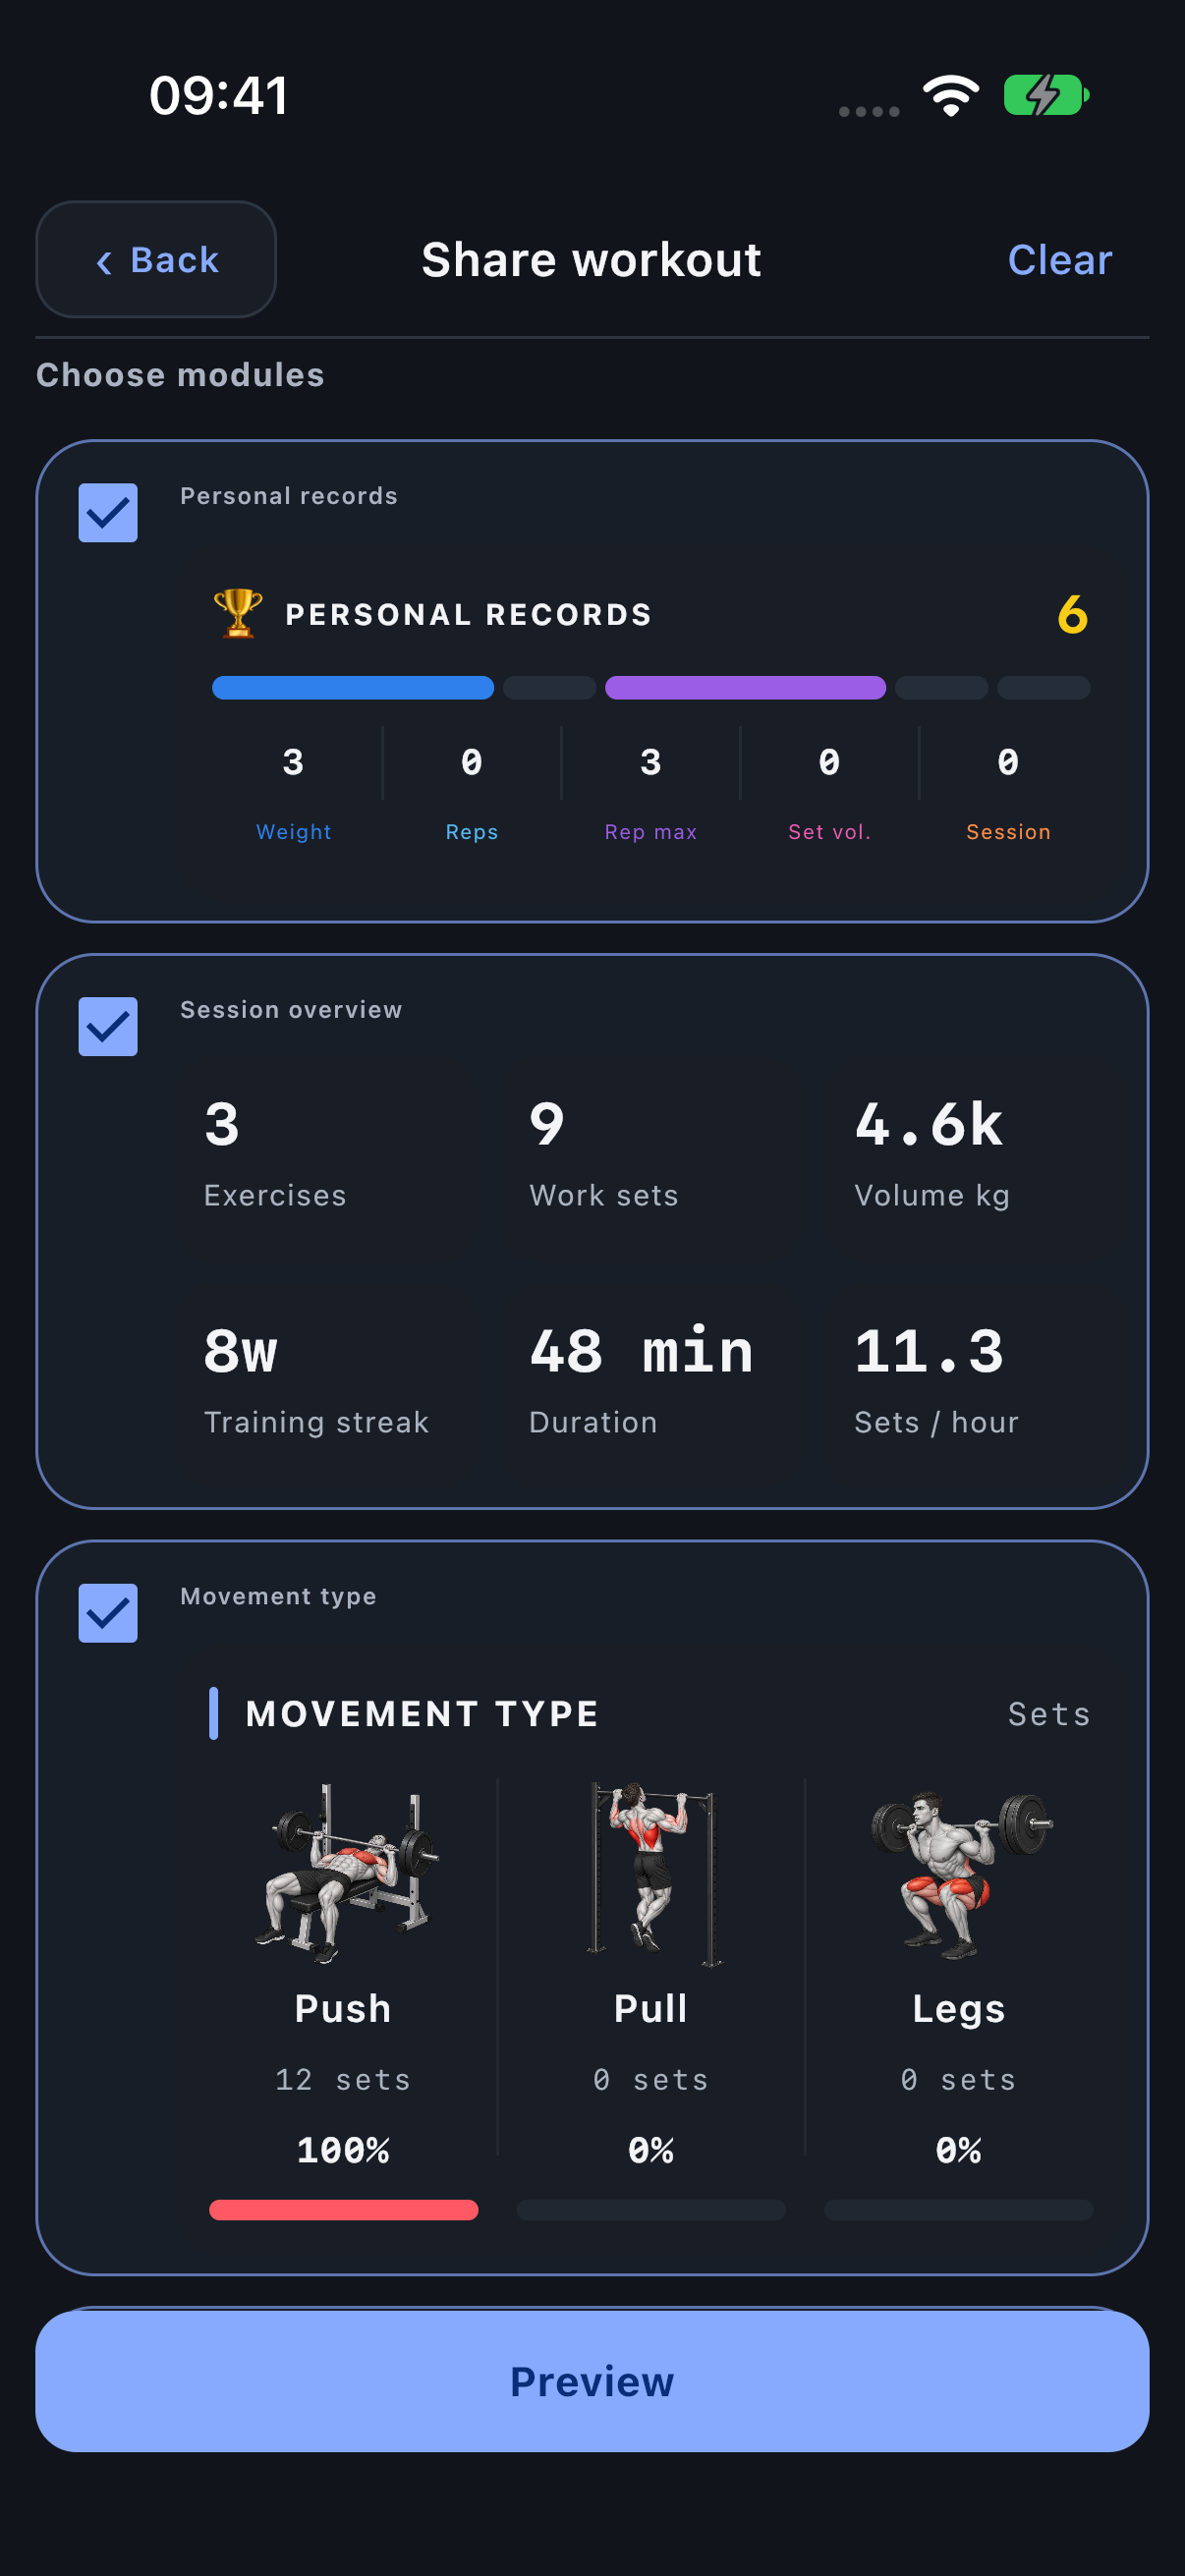
Tap Share, choose the modules that explain what you want to show, review the generated image pages and share. The export preserves the session scope. See Sharing statistics and session results for page selection and the separate share-sheet caption.